Last Updated on February 6, 2018
Hi and welcome to another tutorial from Codingdemos, in this tutorial you will learn how to use Android TextInputLayout to display live count of the number of characters and how you can set max chars for TextInputEditText in android.
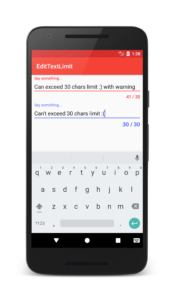
By the end of this tutorial, you will have an app that looks like this. (Large preview)
In this tutorial we will be using the following:
-
– Android studio version 3.0
– Android emulator Nexus 5 with API 26
– Minimum SDK API 16
1- Open up Android Studio and create a new project and give it a name, in our case we’ve named it (EditTextLimit), choose API 16 as the minimum SDK, then choose a blank activity, click “Finish” and wait for Android Studio to build your project.
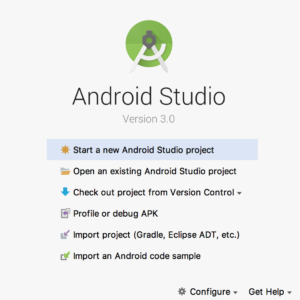
Create new Android Studio project. (Large preview)
2- Open up colors.xml file to change the main colors of the app.
  < color name="colorPrimary">#F44336< /color>
  < color name="colorPrimaryDark">#D32F2F< /color>
  < color name="colorAccent">#536DFE< /color>
  < color name="colorRed">#ff0000< /color>
Note: You will use (colorRed) later as a warning indicator for TextInputEditText in android.
3- Build and run the app to see the new colors.
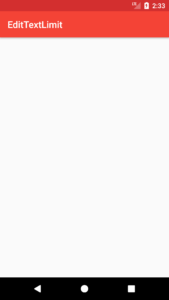
Changed the app main colors. (Large preview)
4- Open up styles.xml file to add the following styles, these styles will be used to customize the appearance of Android TextInputLayout.
< style name="TextLimitStyle" parent="TextAppearance.AppCompat.Small">
    < item name="android:textColor">@color/colorAccent< /item>
    < item name="android:textStyle">bold< /item>
    < item name="android:textSize">18sp< /item>
  < /style>

  < style name="TextLimitError" parent="TextAppearance.AppCompat.Small">
    < item name="android:textColor">@color/colorRed< /item>
  < /style>
5- Open up activity_main.xml file, here you will need to add the first Android TextInputLayout.
< android.support.design.widget.TextInputLayout
    android:layout_width="match_parent"
    android:layout_height="wrap_content">

    < android.support.design.widget.TextInputEditText
      android:id="@+id/etText"
      android:layout_width="match_parent"
      android:layout_height="wrap_content"
      android:hint="Say something..." />
  < /android.support.design.widget.TextInputLayout>
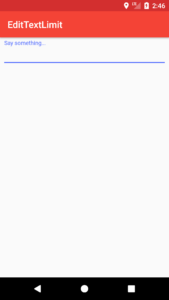
Android TextInputLayout. (Large preview)
6- Next you need to show a counter that will count the number of character as you type and display it below TextInputLayout, so add this attribute app:counterEnabled="true" inside TextInputLayout.
< android.support.design.widget.TextInputLayout
    android:layout_width="match_parent"
    android:layout_height="wrap_content"
    app:counterEnabled="true">

    < android.support.design.widget.TextInputEditText
      android:id="@+id/etText"
      android:layout_width="match_parent"
      android:layout_height="wrap_content"
      android:hint="Say something..." />
  < /android.support.design.widget.TextInputLayout>
7- Build and run the app to see the progress.
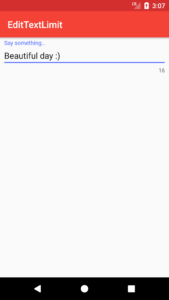
Android TextInputLayout with counter. (Large preview)
8- Now you need to show the maximum characters this TextInputLayout can accept by adding this attribute app:counterMaxLength="30" inside TextInputLayout.
< android.support.design.widget.TextInputLayout
    android:layout_width="match_parent"
    android:layout_height="wrap_content"
    app:counterEnabled="true"
    app:counterMaxLength="30">

    < android.support.design.widget.TextInputEditText
      android:id="@+id/etText"
      android:layout_width="match_parent"
      android:layout_height="wrap_content"
      android:hint="Say something..." />
  < /android.support.design.widget.TextInputLayout>
Note: It’s up to you to the choose maximum value that you want, but for this tutorial we use 30.
9- Build and run the app to see TextInputLayout showing maximum characters limit next to counter.
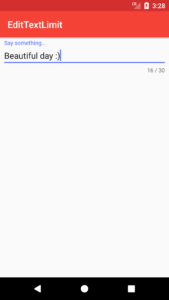
Android TextInputLayout with maximum length. (Large preview)
10- Now if you noticed that when the number of characters exceed the maximum value (30) the color will change to Purple, let’s change that by using this attribute app:counterOverflowTextAppearance="@style/TextLimitError" which will reference one of the styles that you’ve created earlier.
< android.support.design.widget.TextInputLayout
    android:layout_width="match_parent"
    android:layout_height="wrap_content"
    app:counterEnabled="true"
    app:counterMaxLength="30"
    app:counterOverflowTextAppearance="@style/TextLimitError">

    < android.support.design.widget.TextInputEditText
      android:id="@+id/etText"
      android:layout_width="match_parent"
      android:layout_height="wrap_content"
      android:hint="Say something..." />
  < /android.support.design.widget.TextInputLayout>
11- Build and run the app to see the difference.
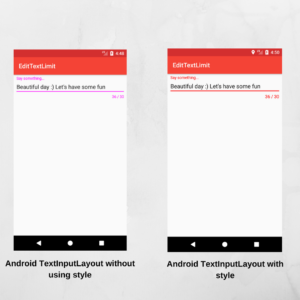
Android TextInputLayout without and with style. (Large preview)
12- Now you are done working on the first Android TextInputLayout, next you need to add the second layout below it. The only difference between the two are the style that is being used and Android maximum length attribute, this attribute is use to prevent you from exceeding the number of characters limit (30).
< android.support.design.widget.TextInputLayout
    android:layout_width="match_parent"
    android:layout_height="wrap_content"
    app:counterEnabled="true"
    app:counterMaxLength="30"
    app:counterTextAppearance="@style/TextLimitStyle">

    < android.support.design.widget.TextInputEditText
      android:id="@+id/etMessage"
      android:layout_width="match_parent"
      android:layout_height="wrap_content"
      android:gravity="top"
      android:hint="Say something..."
      android:maxLength="30" />
  < /android.support.design.widget.TextInputLayout>
13- The app is complete, build and run the app to see the final output.
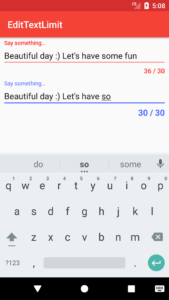
Android TextInputLayout counter with character limit. (Large preview)
14- The source code for this tutorial is available on GitHub, I hope you find this tutorial helpful and if you have any question please post them in the comment below.

Hi sir. Do you know how to add multilines when using this textinputlayout feature? Bcs no matter how hard i try I lost that functionwhile using textinputlayout with edittexts. Thanks
Hi, you can add this line inside TextInputEditText: android:inputType=”textMultiLine”
I am having issues with regard to visibility of the counter once the whole page is filled with text. The counter disappears below the page. Only the separator line is still visible.
Is is possible to fix the counter bar below and only scroll the input text easily, i.e. with some option of TextInputLayout?
Hi, hmm…that is strange. Can you email me (codingdemos@gmail.com) the code so that I can see the issue?
The count character doesn’t appear. Multiline also doesn’t work as it doesn’t wrap to the next line.
Hi, can you please email me (codingdemos@gmail.com) a screenshot of the issue and the xml code?
Hi there! I little out of scope of this article, but I have been searching around for issues surrounding Talkback accessibility with the TextInputLayout and have found nothing. When testing accessibility with Talkback on the TextInputLayout wrapping a TextInputEditText, the TextInputLayout is messing up the Talkback announcements, announcing “end of field” on a character being typed and deleted instead of announcing the character itself. I was hoping to have others test theirs and see if they are seeing the same behavior in Talkback. Thanks!
sos un genioooooo
justo lo que ocuaba