Last Updated on May 26, 2018
Hi and welcome to another tutorial from Codingdemos, in this Android Tablayout example you will learn how to add Android tab layout with swipeable views inside your app. You will build an Android app with 3 Tablayout tabs, every time you swipe to other page the colors of the app will change.
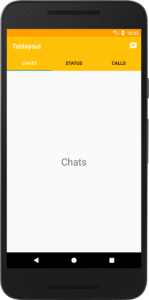
By the end of this tutorial, you will have an app that looks like this. (Large preview)
In this Android Tablayout example we will be using the following:
– Android studio version 3.0.1
– Android emulator Nexus 5X with API 26
– Minimum SDK API 16
1- Open up Android Studio and create a new project and give it a name, in our case we’ve named it (TabLayout), choose API 16 as the minimum SDK, then choose a blank activity, click “Finish” and wait for Android Studio to build your project.
2- Open up build.gradle (Module:app) file and add the following code.
implementation 'com.android.support:design:26.1.0'
You will be using Android Tablayout, so you have to add that library inside the file.
Sync your project by clicking on Sync Now.

Android Studio sync project. (Large preview)
3- Open up colors.xml file, add the following code to change the app main colors.
< color name="colorPrimary">#795548< /color>
< color name="colorPrimaryDark">#5D4037< /color>
< color name="colorAccent">#CDDC39< /color>
4- Open up styles.xml file and change the parent theme so that you can use Android Toolbar.
style name="AppTheme" parent="Theme.AppCompat.Light.NoActionBar"
5- Open up activity_main.xml file and add Android Toolbar.
< android.support.v7.widget.Toolbar
    android:id="@+id/toolbar"
    android:layout_width="match_parent"
    android:layout_height="wrap_content"
    android:background="?attr/colorPrimary"
    android:minHeight="?attr/actionBarSize"
    android:theme="?attr/actionBarTheme"
    app:popupTheme="@style/ThemeOverlay.AppCompat.Light"
    app:theme="@style/ThemeOverlay.AppCompat.Dark" />

Android Toolbar with new app colors. (Large preview)
6- Next you need to add Android Tablayout below Toolbar.
< android.support.design.widget.TabLayout
    android:id="@+id/tablayout"
    android:layout_width="match_parent"
    android:layout_height="wrap_content">

    < android.support.design.widget.TabItem
      android:layout_width="wrap_content"
      android:layout_height="wrap_content"
      android:text="Left" />

    < android.support.design.widget.TabItem
      android:layout_width="wrap_content"
      android:layout_height="wrap_content"
      android:text="Center" />

    < android.support.design.widget.TabItem
      android:layout_width="wrap_content"
      android:layout_height="wrap_content"
      android:text="Right" />
  < /android.support.design.widget.TabLayout>
7- Now you need to customize the appearance of Android Tablayout by changing the bar background color, selected tab color and the tabs text color.
android:background="@color/colorPrimary"
app:tabSelectedTextColor="@android:color/white"
app:tabTextColor="@android:color/black"
8- Build and run the app to see the new background color.
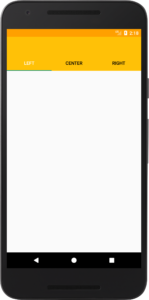
Android Tablayout background colors. (Large preview)
9- Change the ID and text for each Android Tab under Tablayout.
    < android.support.design.widget.TabItem
      android:id="@+id/tabChats"
      android:layout_width="wrap_content"
      android:layout_height="wrap_content"
      android:text="Chats" />

    < android.support.design.widget.TabItem
      android:id="@+id/tabStatus"
      android:layout_width="wrap_content"
      android:layout_height="wrap_content"
      android:text="Status" />

    < android.support.design.widget.TabItem
      android:id="@+id/tabCalls"
      android:layout_width="wrap_content"
      android:layout_height="wrap_content"
      android:text="Calls" />
10- Build and run the app to see the changes.
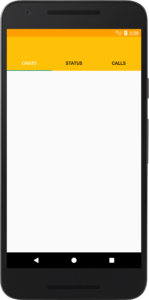
Changed text for Android Tablayout tabs. (Large preview)
11- Now you need to add Android ViewPager, this view will allow you to swipe left and right through Android Tablayout tabs using finger gesture.
< android.support.v4.view.ViewPager
    android:id="@+id/viewPager"
    android:layout_width="match_parent"
    android:layout_height="wrap_content" />
12- The full code for activity_main.xml will look like this.
< ?xml version="1.0" encoding="utf-8"?>
< LinearLayout xmlns:android="http://schemas.android.com/apk/res/android"
  xmlns:app="http://schemas.android.com/apk/res-auto"
  xmlns:tools="http://schemas.android.com/tools"
  android:layout_width="match_parent"
  android:layout_height="match_parent"
  android:orientation="vertical"
  tools:context="com.codingdemos.tablayout.MainActivity">

  < android.support.v7.widget.Toolbar
    android:id="@+id/toolbar"
    android:layout_width="match_parent"
    android:layout_height="wrap_content"
    android:background="?attr/colorPrimary"
    android:minHeight="?attr/actionBarSize"
    android:theme="?attr/actionBarTheme"
    app:popupTheme="@style/ThemeOverlay.AppCompat.Light"
    app:theme="@style/ThemeOverlay.AppCompat.Dark" />

  < android.support.design.widget.TabLayout
    android:id="@+id/tablayout"
    android:layout_width="match_parent"
    android:layout_height="wrap_content"
    android:background="@color/colorPrimary"
    app:tabSelectedTextColor="@android:color/white"
    app:tabTextColor="@android:color/black">

    < android.support.design.widget.TabItem
      android:id="@+id/tabChats"
      android:layout_width="wrap_content"
      android:layout_height="wrap_content"
      android:text="Chats" />

    < android.support.design.widget.TabItem
      android:id="@+id/tabStatus"
      android:layout_width="wrap_content"
      android:layout_height="wrap_content"
      android:text="Status" />

    < android.support.design.widget.TabItem
      android:id="@+id/tabCalls"
      android:layout_width="wrap_content"
      android:layout_height="wrap_content"
      android:text="Calls" />

  < /android.support.design.widget.TabLayout>

  < android.support.v4.view.ViewPager
    android:id="@+id/viewPager"
    android:layout_width="match_parent"
    android:layout_height="wrap_content" />
< /LinearLayout>
13- Open up MainActivity.java file to define Android Toolbar, Tablayout and ViewPager.
Toolbar toolbar = findViewById(R.id.toolbar);
toolbar.setTitle(getResources().getString(R.string.app_name));
Tablayout tabLayout = findViewById(R.id.tablayout);
TabItem tabChats = findViewById(R.id.tabChats);
TabItem tabStatus = findViewById(R.id.tabStatus);
TabItem tabCalls = findViewById(R.id.tabCalls);
ViewPager viewPager = findViewById(R.id.viewPager);
14- To be able to have the swipe left and right with finger gesture function, you will need to create another Java file which you will use it together with Android ViewPager.
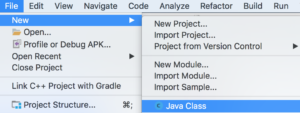
How to create Java class in Android Studio. (Large preview)
15- Name the new Java file PageAdapter.java.
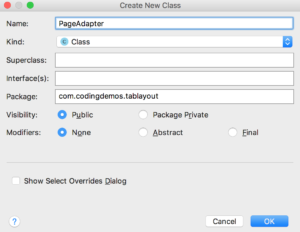
Android Studio create new class dialog. (Large preview)
16- Now make PagerAdapter.java class extends Android FragmentPagerAdapter, Android Studio will show an error telling you to implement the required methods.
17- After you have added Android FragmentPagerAdapter required methods, the code for PagerAdapter.java will look like this.
public class PageAdapter extends FragmentPagerAdapter {

    public PageAdapter(FragmentManager fm) {
        super(fm);
    }

    @Override
    public Fragment getItem(int position) {
        return null;
    }

    @Override
    public int getCount() {
        return 0;
    }
}
Note: Android FragmentPagerAdapter is used when you have a limited number of tabs that want to swipe through. If you have a dynamic tabs then you need to use Android FragmentStatePagerAdapter.
- PageAdapter constructor is use to communicate between this class and MainActivity.java.
- getItem is where you will initialize the fragments for Android Tablayout. In this Android Tablayout example you will have 3 Android Fragments (Chat, Status and Calls).
- getCount Will return the number of tabs that will appear in Android Tablayout.
18- Now you need to create 3 new Android Fragments for Android Tablayout.
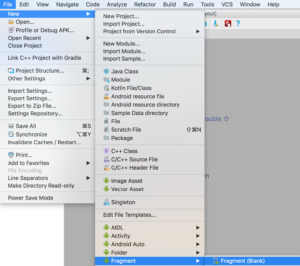
Create fragment in Android Studio. (Large preview)
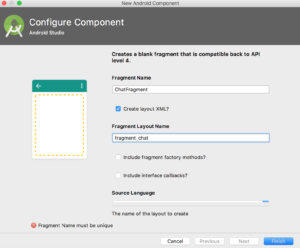
Android Studio blank fragment. (Large preview)
You can name those Android Fragments as ChatFragment, StatusFragment and CallFragment.
19- Open up again PageAdapter.java file, here you will need to define a variable that hold the size of Android Tablayout tabs and update the constructor to include that variable.
    private int numOfTabs;

    PageAdapter(FragmentManager fm, int numOfTabs) {
        super(fm);
        this.numOfTabs = numOfTabs;
    }
20- Now you need to define Android fragments inside getItem.
switch (position) {
            case 0:
                return new ChatFragment();
            case 1:
                return new StatusFragment();
            case 2:
                return new CallFragment();
            default:
                return null;
        }
21- Finally update getCount to return the correct number of tabs.
return numOfTabs;
22- The full code for PageAdapter.java file will look like this.
public class PageAdapter extends FragmentPagerAdapter {

    private int numOfTabs;

    PageAdapter(FragmentManager fm, int numOfTabs) {
        super(fm);
        this.numOfTabs = numOfTabs;
    }

    @Override
    public Fragment getItem(int position) {
        switch (position) {
            case 0:
                return new ChatFragment();
            case 1:
                return new StatusFragment();
            case 2:
                return new CallFragment();
            default:
                return null;
        }
    }

    @Override
    public int getCount() {
        return numOfTabs;
    }
}
23- Open up MainActivity.java and define PageAdapter.
PageAdapter pageAdapter = new PageAdapter(getSupportFragmentManager(), tabLayout.getTabCount());
Here you pass 2 arguments: Android getSupportFragmentManager() and the total number of tabs in Android Tablayout.
24- Now you can use pageAdapter as the adapter for Android ViewPager.
viewPager.setAdapter(pageAdapter);
25- Build and run the app to see the progress.
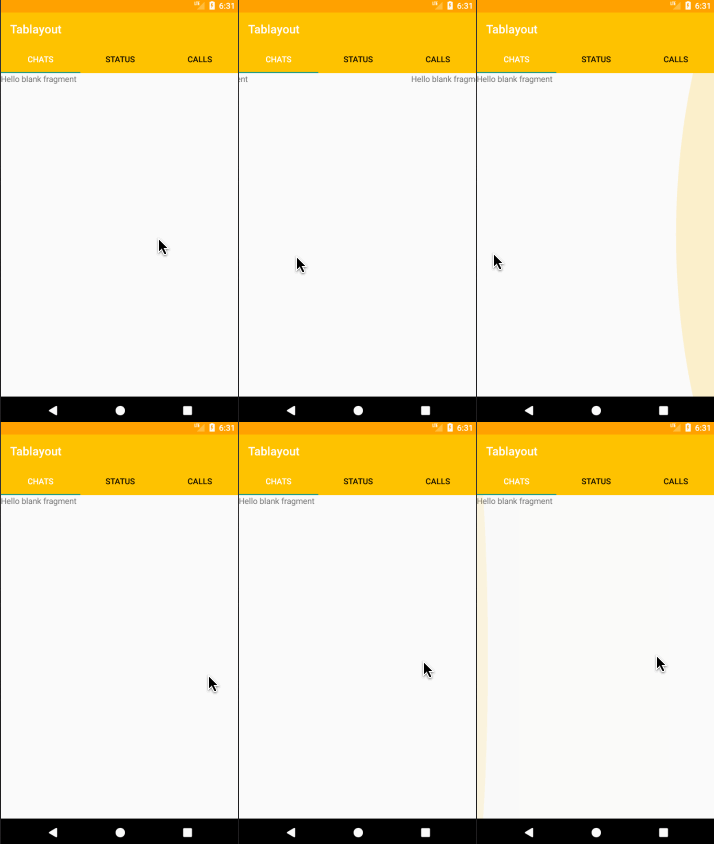
Android Tablayout example with tabs. (Large preview)
26- Now you got the swipe function working, but the problem is Android Tablayout indicator doesn’t change while you swipe to other tabs!
You can fix it by attaching Android Tablayout with Viewpager, so when you try to swipe it will sync with Tablayout tabs indicator.
viewPager.addOnPageChangeListener(new TabLayout.TabLayoutOnPageChangeListener(tabLayout));
27- Build and run the app to see the changes.
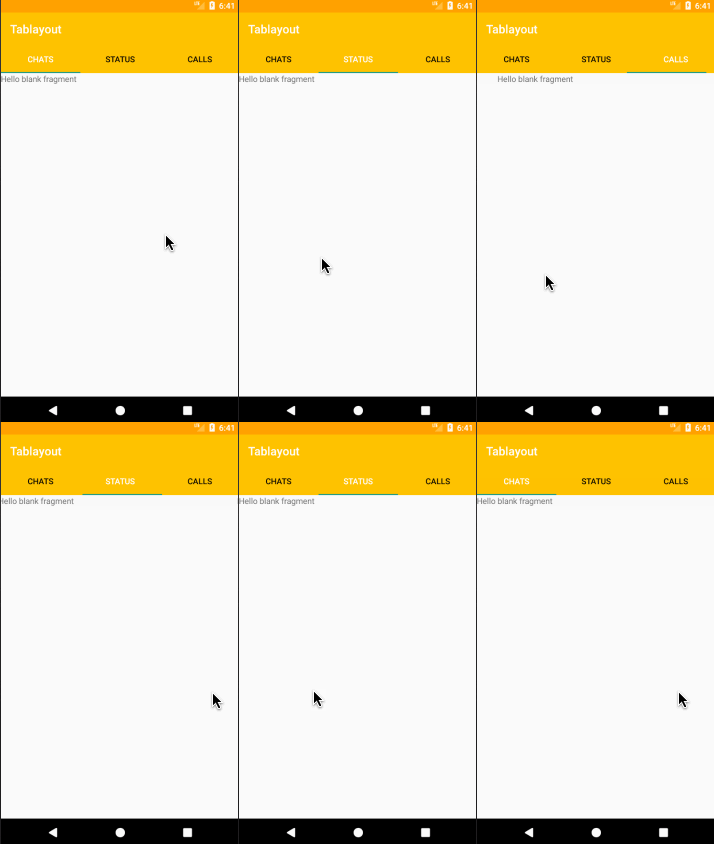
Android Tablayout example with working tabs. (Large preview)
28- You can change the text that appears inside each Android Fragment with something related to the tab. For example if you swipe to Chat tab you will see Chat text appears inside that page…etc
fragment_chat.xml
< TextView
    android:layout_width="wrap_content"
    android:layout_height="wrap_content"
    android:layout_gravity="center_vertical|center_horizontal"
    android:text="Chats"
    android:textSize="30sp" />
fragment_status.xml
< TextView
    android:layout_width="wrap_content"
    android:layout_height="wrap_content"
    android:layout_gravity="center_vertical|center_horizontal"
    android:text="Status"
    android:textSize="30sp" />
fragment_call.xml
< TextView
    android:layout_width="wrap_content"
    android:layout_height="wrap_content"
    android:layout_gravity="center_vertical|center_horizontal"
    android:text="Calls"
    android:textSize="30sp" />
How to change Android Toolbar background color
In this section, you will learn how you can change Android Toolbar background color every time you swipe left and right using Android ViewPager.
29- Open up MainActivity.java file and define Android TabLayout.addOnTabSelectedListener.
tabLayout.addOnTabSelectedListener(new TabLayout.OnTabSelectedListener() {
            @Override
            public void onTabSelected(TabLayout.Tab tab) {

            }

            @Override
            public void onTabUnselected(TabLayout.Tab tab) {

            }

            @Override
            public void onTabReselected(TabLayout.Tab tab) {

            }
        });
30- Inside Android onTabSelected method you add the following code.
 if (tab.getPosition() == 1) {
    toolbar.setBackgroundColor(ContextCompat.getColor(MainActivity.this,
    R.color.colorAccent));
 } else if (tab.getPosition() == 2) {
    toolbar.setBackgroundColor(ContextCompat.getColor(MainActivity.this,
    android.R.color.darker_gray));
 } else {
    toolbar.setBackgroundColor(ContextCompat.getColor(MainActivity.this,
    R.color.colorPrimary));
 }
31- Build and run the app.
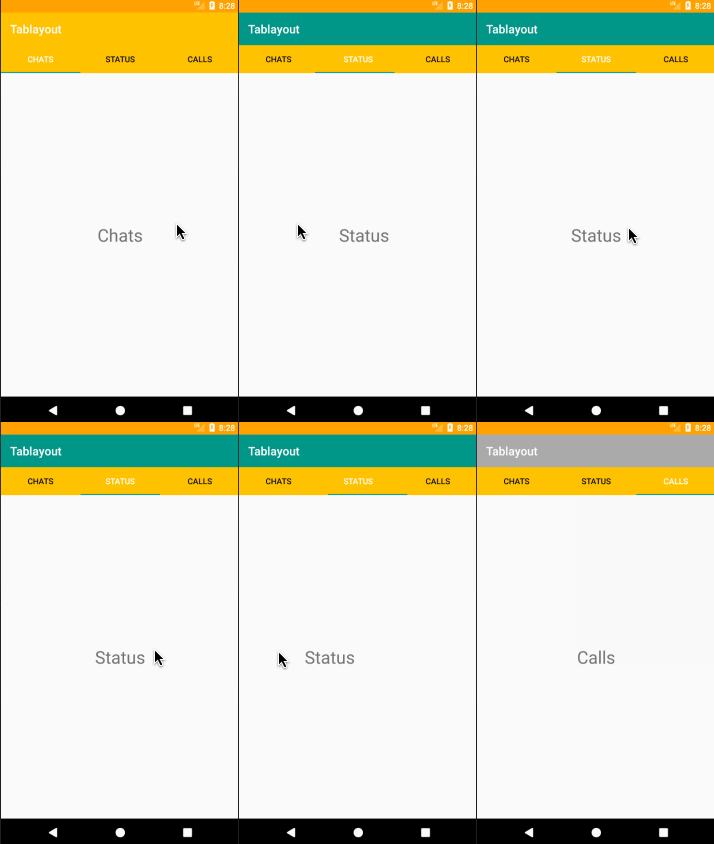
Android Tablayout example with new Toolbar background color. (Large preview)
How to change Android Tablayout background color
In this section, you will learn how you can change Android Tablayout background color every time you swipe left and right using Android ViewPager.
32- Modify Android onTabSelected method to include the following code.
 if (tab.getPosition() == 1) {
   tabLayout.setBackgroundColor(ContextCompat.getColor(MainActivity.this,
   R.color.colorAccent));
 } else if (tab.getPosition() == 2) {
   tabLayout.setBackgroundColor(ContextCompat.getColor(MainActivity.this,
   android.R.color.darker_gray));
 } else {
   tabLayout.setBackgroundColor(ContextCompat.getColor(MainActivity.this,
   R.color.colorPrimary));
 }
33- Build and run the app.
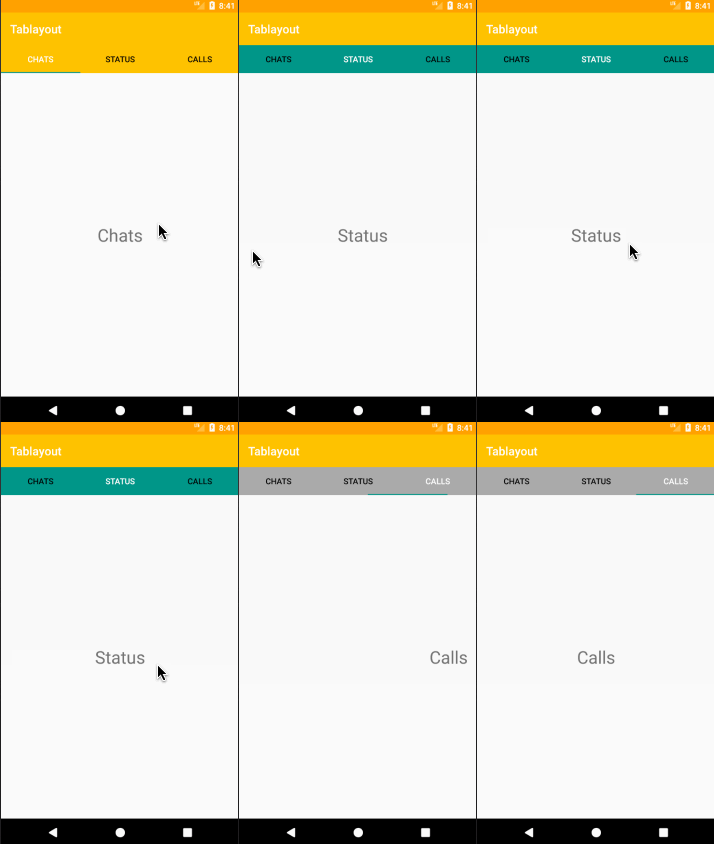
Android Tablayout example with new background color. (Large preview)
How to change Android Status bar background color
In this section, you will learn how you can change Android Status bar background color every time you swipe left and right using Android ViewPager.
Note: Changing Android Status bar background color is only available to API level 21 (Lollipop) and above.
34- Add the following code inside Android onTabSelected method.
if (tab.getPosition() == 1) {
    if (Build.VERSION.SDK_INT >= Build.VERSION_CODES.LOLLIPOP) {
        getWindow().setStatusBarColor(ContextCompat.getColor(MainActivity.this,
                R.color.colorAccent));
    }
} else if (tab.getPosition() == 2) {
    if (Build.VERSION.SDK_INT >= Build.VERSION_CODES.LOLLIPOP) {
        getWindow().setStatusBarColor(ContextCompat.getColor(MainActivity.this,
                android.R.color.darker_gray));
    }
} else {
    if (Build.VERSION.SDK_INT >= Build.VERSION_CODES.LOLLIPOP) {
        getWindow().setStatusBarColor(ContextCompat.getColor(MainActivity.this,
                R.color.colorPrimaryDark));
    }
}
35- Build and run the app to see the changes.
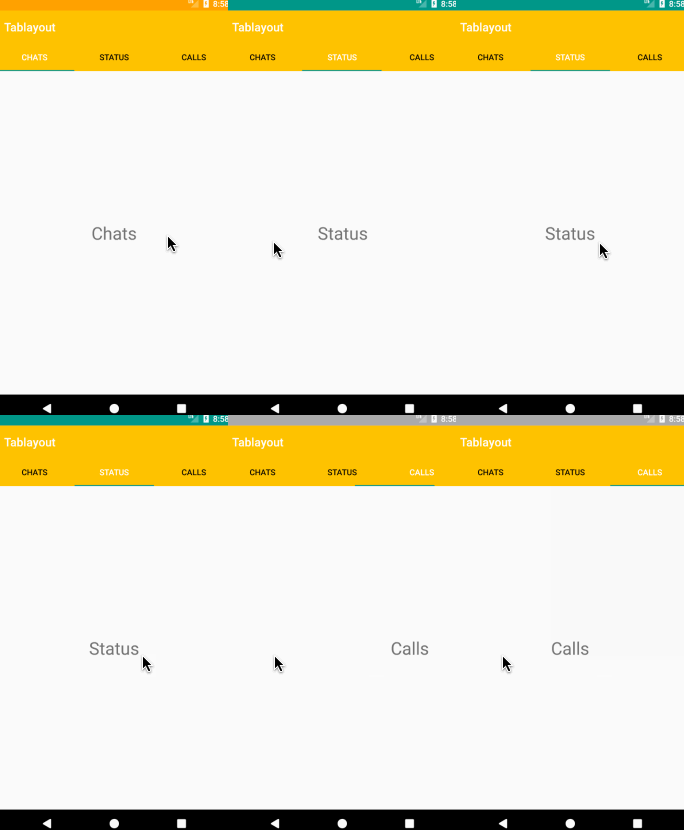
Android Tablayout example with new Status bar background color. (Large preview)
Android Tablayout with Toolbar(ActionBar) menu items
In this section, you will learn how you can show different Toolbar(ActionBar) menu items every time you swipe left and right using Android ViewPager.
36- Open up MainActivity.java file and add the following code below Android Toolbar definition.
setSupportActionBar(toolbar);
You need to add it so that the menu items will appear on Android Toolbar.
37- The full code for MainActivity.java will look like this.
public class MainActivity extends AppCompatActivity {

    Toolbar toolbar;
    TabLayout tabLayout;
    ViewPager viewPager;
    PageAdapter pageAdapter;
    TabItem tabChats;
    TabItem tabStatus;
    TabItem tabCalls;

    @Override
    protected void onCreate(Bundle savedInstanceState) {
        super.onCreate(savedInstanceState);
        setContentView(R.layout.activity_main);

        toolbar = findViewById(R.id.toolbar);
        toolbar.setTitle(getResources().getString(R.string.app_name));
        setSupportActionBar(toolbar);

        tabLayout = findViewById(R.id.tablayout);
        tabChats = findViewById(R.id.tabChats);
        tabStatus = findViewById(R.id.tabStatus);
        tabCalls = findViewById(R.id.tabCalls);
        viewPager = findViewById(R.id.viewPager);

        pageAdapter = new PageAdapter(getSupportFragmentManager(), tabLayout.getTabCount());
        viewPager.setAdapter(pageAdapter);
        viewPager.addOnPageChangeListener(new TabLayout.TabLayoutOnPageChangeListener(tabLayout));

        tabLayout.addOnTabSelectedListener(new TabLayout.OnTabSelectedListener() {
            @Override
            public void onTabSelected(TabLayout.Tab tab) {
                viewPager.setCurrentItem(tab.getPosition());
                if (tab.getPosition() == 1) {
                    toolbar.setBackgroundColor(ContextCompat.getColor(MainActivity.this,
                            R.color.colorAccent));
                    tabLayout.setBackgroundColor(ContextCompat.getColor(MainActivity.this,
                            R.color.colorAccent));
                    if (Build.VERSION.SDK_INT >= Build.VERSION_CODES.LOLLIPOP) {
                        getWindow().setStatusBarColor(ContextCompat.getColor(MainActivity.this,
                                R.color.colorAccent));
                    }
                } else if (tab.getPosition() == 2) {
                    toolbar.setBackgroundColor(ContextCompat.getColor(MainActivity.this,
                            android.R.color.darker_gray));
                    tabLayout.setBackgroundColor(ContextCompat.getColor(MainActivity.this,
                            android.R.color.darker_gray));
                    if (Build.VERSION.SDK_INT >= Build.VERSION_CODES.LOLLIPOP) {
                        getWindow().setStatusBarColor(ContextCompat.getColor(MainActivity.this,
                                android.R.color.darker_gray));
                    }
                } else {
                    toolbar.setBackgroundColor(ContextCompat.getColor(MainActivity.this,
                            R.color.colorPrimary));
                    tabLayout.setBackgroundColor(ContextCompat.getColor(MainActivity.this,
                            R.color.colorPrimary));
                    if (Build.VERSION.SDK_INT >= Build.VERSION_CODES.LOLLIPOP) {
                        getWindow().setStatusBarColor(ContextCompat.getColor(MainActivity.this,
                                R.color.colorPrimaryDark));
                    }
                }
            }

            @Override
            public void onTabUnselected(TabLayout.Tab tab) {

            }

            @Override
            public void onTabReselected(TabLayout.Tab tab) {

            }
        });


    }
}
38- Create a menu folder.
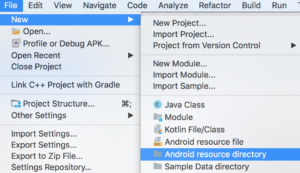
Create menu folder in Android Studio. (Large preview)
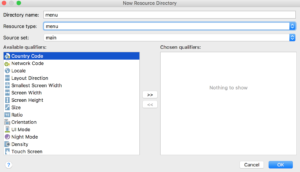
Create menu folder in Android Studio. (Large preview)
39- Create 3 menu resource files inside Android Menu folder and name them:
- menu_calls.xml
- menu_chats.xml
- menu_status.xml

Create menu resource file in Android Studio. (Large preview)
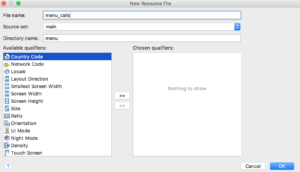
Create menu resource file in Android Studio. (Large preview)
40- Create an icon for the menu items using Android Studio Vector asset.
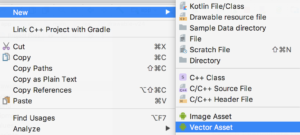
Vector asset in Android Studio. (Large preview)
41- Choose 3 icons from Vector Asset studio: Call, Chat and Create.
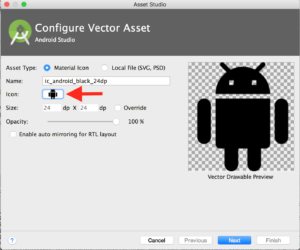
Android studio asset studio. (Large preview)
42- Add a menu item to every menu resource file.
menu_chats.xml
< item
    android:id="@+id/action_chat"
    android:icon="@drawable/ic_chat_white_24dp"
    android:title="Chat"
    app:showAsAction="ifRoom" />
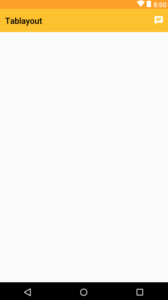
Chat menu item. (Large preview)
menu_status.xml
< item
    android:id="@+id/action_status"
    android:icon="@drawable/ic_create_white_24dp"
    android:title="Post status"
    app:showAsAction="ifRoom" />
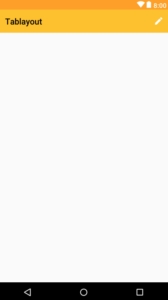
Status menu item. (Large preview)
menu_calls.xml
< item
    android:id="@+id/action_call"
    android:icon="@drawable/ic_call_white_24dp"
    android:title="Make call"
    app:showAsAction="ifRoom" />
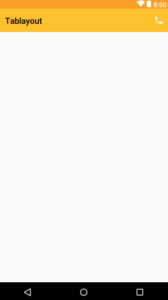
Call menu item. (Large preview)
43- Open up ChatFragment.java file, add the following code inside Android onCreateView before this line:
return inflater.inflate(R.layout.fragment_chat, container, false);.
setHasOptionsMenu(true);
This is to ensure that the menu item will appear for this fragment.
44- Next you need to override Android onCreateOptionsMenu and onOptionsItemSelected.
45- Inside onCreateOptionsMenu method you need to inflate the menu file.
inflater.inflate(R.menu.menu_chats, menu);
46- Now inside onOptionsItemSelected method, you will check for the item that was clicked and then show an Android Toast message which contain the menu item title.
if (item.getItemId() == R.id.action_chat) {
    Toast.makeText(getActivity(), "Clicked on " + item.getTitle(), Toast.LENGTH_SHORT)
            .show();
}
return true;
47- Here is the code for ChatFragment.java.
public class ChatFragment extends Fragment {

    @Override
    public View onCreateView(LayoutInflater inflater, ViewGroup container,
                             Bundle savedInstanceState) {
        // Inflate the layout for this fragment
        setHasOptionsMenu(true);
        return inflater.inflate(R.layout.fragment_chat, container, false);
    }

    @Override
    public void onCreateOptionsMenu(Menu menu, MenuInflater inflater) {
        inflater.inflate(R.menu.menu_chats, menu);
    }

    @Override
    public boolean onOptionsItemSelected(MenuItem item) {
        if (item.getItemId() == R.id.action_chat) {
            Toast.makeText(getActivity(), "Clicked on " + item.getTitle(), Toast.LENGTH_SHORT)
                    .show();
        }
        return true;
    }
}
48- You will repeat steps number (42, 43, 44 and 45) for StatusFragment.java and CallFragment.java and make sure to choose the correct menu file and menu item.
49- Here is the code for StatusFragment.java.
public class StatusFragment extends Fragment {

    @Override
    public View onCreateView(LayoutInflater inflater, ViewGroup container,
                             Bundle savedInstanceState) {
        // Inflate the layout for this fragment
        setHasOptionsMenu(true);
        return inflater.inflate(R.layout.fragment_status, container, false);
    }

    @Override
    public void onCreateOptionsMenu(Menu menu, MenuInflater inflater) {
        inflater.inflate(R.menu.menu_status, menu);
    }

    @Override
    public boolean onOptionsItemSelected(MenuItem item) {
        if (item.getItemId() == R.id.action_status) {
            Toast.makeText(getActivity(), "Clicked on " + item.getTitle(), Toast.LENGTH_SHORT)
                    .show();
        }
        return true;
    }
}
50- The code inside CallFragment.java will look like this.
public class CallFragment extends Fragment {

    @Override
    public View onCreateView(LayoutInflater inflater, ViewGroup container,
                             Bundle savedInstanceState) {
        // Inflate the layout for this fragment
        setHasOptionsMenu(true);
        return inflater.inflate(R.layout.fragment_call, container, false);
    }

    @Override
    public void onCreateOptionsMenu(Menu menu, MenuInflater inflater) {
        inflater.inflate(R.menu.menu_calls, menu);
    }

    @Override
    public boolean onOptionsItemSelected(MenuItem item) {
        if (item.getItemId() == R.id.action_call) {
            Toast.makeText(getActivity(), "Clicked on " + item.getTitle(), Toast.LENGTH_SHORT)
                    .show();
        }
        return true;
    }
}
51- Build and run the app to see the progress.
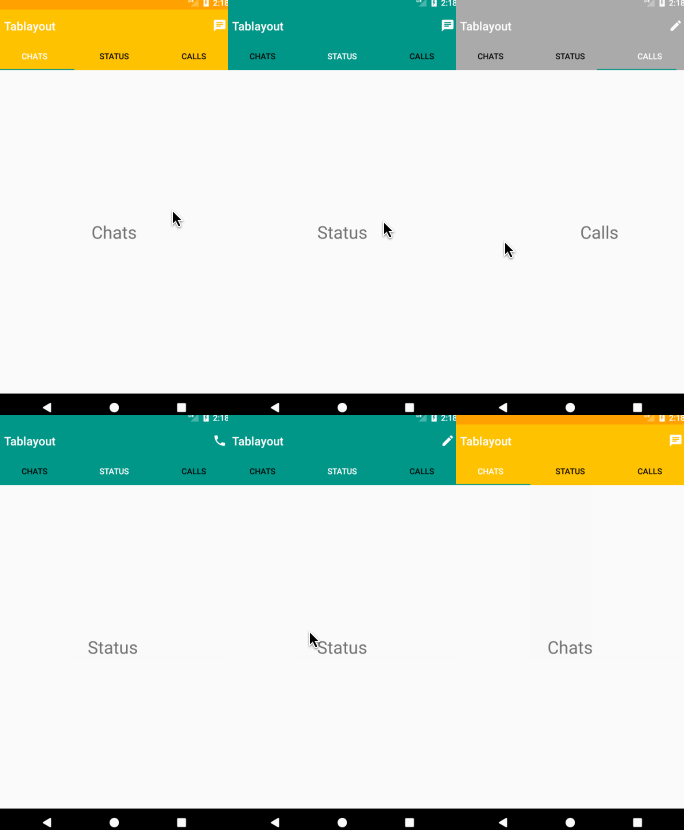
Android Tablayout Example. (Large preview)
52- The source code for Android Tablayout example is available on GitHub, I hope you find this tutorial helpful and if you have any question please post them in the comment below.

This was really helpful for me just learning Android programming. I have the swiping changing colors and loading content, BUT I can’t for the life of me figure out why when I CLICK the menu items the content doesn’t load in either the menu or in the content area.
Yet, when I click the colors change.
I’m missing something here!
Hi George,
Did you create PageAdapter class and did you set it as the adapter for ViewPager?
i am getting an error in page adapter call as
Refactoring can not be performed .
Can you help me to get through this?
Hi Siva,
May I know what is the error message? What are you trying to refactor?
Your PageAdapter became PagerAdapter in number 19
Thanks for pointing that out, it’s fixed 🙂
I got error like this :-
error: cannot find symbol class PageAdapter
Hi, did you create PageAdapter.java class in your project?
Really very nice
Hi , is there a way to have these tabs and an up arrow? I didn’t want to set my tabs on my main screen so I need a way back to the main. Thank you
Hi Lisa,
I made a tutorial that shows you how to add that arrow: https://www.codingdemos.com/android-toolbar-back-button/
I hope that helps 🙂
Hi,
sir can you tell me what is tabLayout.getTabCount()?
Hi Bilal, this returns the number of tabs available in tab layout
hi ..i applied menu and did all procedure but in app menus are not visible and clickable also it didn’t give any error currently i am using android in api sdk 28.
Hi Uday, did you set the viewpager adapter to pageAdapter? Like this: viewPager.setAdapter(pageAdapter);
This is not working for me. tabLayout.getTabCount() causes the app to crash at runtime. When I put an int of 3 in its place, it works fine. I cannot get the tabs to change on swiping when it does run. Do you have a github repository where I can download a working version of this app or would you be able to provide me with a zip file so I can see why my code isn’t working?
even i’m facing the same problem. Did u find a solution?
Hi, here is the link to the source code on Github: https://github.com/codingdemos/Tablayout
Hi! I want to add working buttons inside each tab for opening child activity, what should I do?
Hi Hilary,
Here is an example of how you can do it for one tab, then you can duplicate the process for other tabs as well:
1- Open up (fragment_chat.xml) file and add a Button.
2- Open up (ChatFragment.java) file and reference the Button following it’s ID
3- You would call (setOnClickListener) for the Button to be able to react to user taps/action.
4- Inside (OnClick) method is where you would start an Intent to direct the user from the current screen to another screen like this:
startActivity(new Intent(getActivity(), NewActivityName.class));
Happy coding 🙂
not working, cant refer button id. help me
Hi Rince, did you add the Button inside the layout file?
Great tutorial. Thank You!
Hi. it moves well with your finger, but when you click on the tab it does not move
Hi, please make sure to add this line: viewPager.addOnPageChangeListener(new TabLayout.TabLayoutOnPageChangeListener(tabLayout));
It won’t move the fragment when i click the view pager menu
Hi, please make sure to add this line: viewPager.addOnPageChangeListener(new TabLayout.TabLayoutOnPageChangeListener(tabLayout));
Sir, I’ve added this. The tabLayout’s indicator moves with the swipeEvent but, when I tap on each Tab itself, the it doesn’t load the fragment..
I guess there needs exist a fragment transaction stuff.
please help
Hi, did you add the following code inside tabLayout.addOnTabSelectedListener:
viewPager.setCurrentItem(tab.getPosition());
Awesome tutorial. Thank you so much!
Your welcome 🙂
🙂
thank you so much. very gooood
Very very nice and easy explanation thanks .
Nice
Thanks for this amazing simplification brother.
What is the correct use of adapter in this case? isnt adapter used for getting the same xml layout multiple times based on the itemcount?
hi thank u for this amazing tutorial
when i add this (tabs.setupWithViewPager(pager)) to mainjava, the icon status or chat in tabs won,t show !
pls help
Sir, Can u share source code here..I have so many errors.
I get this error when I swipe the fragments.
java.lang.NullPointerException: Attempt to invoke virtual method ‘void androidx.appcompat.widget.Toolbar.setBackgroundColor(int)’ on a null object reference
I have implemented it successfully. It is changing the content when i’m sliding it. But it doesn’t change the content if I click on tab headers to change it. Guide me what to do!
My Tab activity is not getting swiped using finger gesture. And In my PagerAdapter.java code the word super is strike through.
My Tab activity is not getting swiped using finger gesture. And In my Pager Adapter.java code the word super is strike through.
Hi, amazing tutorial…
I have a problem. I have three tabs for my app, 1st Categories, 2nd Index and 3rd Favourites
I have a checkbox with every indexed field.
when I check the field as the favorite, it is not shown in the favorite tab. Until I rerun the application.
Please share its solution to update tabs instantly after checking …
Hi, I’m happy that you liked the tutorial 🙂
The solution will be to use Firebase. You will store the checkbox value inside the database. You can use (addValueEventListener) inside the Favorite tab to listen for changes from the database and make the required changes.